Best way to move/copy file(s) in SharePoint

In a modern SharePoint site (or in MS Teams) you can move or copy files with the build in functionality. There is less need for migration tooling. The problem is how do you move/copy a file if it is not available in the pop up screen?

There is a source site with one file that you want to move

In the toolbar you select Move to…

…and the pop screen appears. If the target site is not available in Quick access (1) you can try to find it under More places (2)

So what to do when the target site is still not there?

You should navigate to the target site and choose Add shortcut to OneDrive

Then select Move to again in the source site and select My files in the pop up

The document library of the target site is there! Select it and…

…choose Move here

Navigate to the Target site and check that the file is there.

Hope this helps!

Update properties of a document in SharePoint with Flow

I had the requirement to update some properties of a document in a SharePoint Online document library based on another property. The source property is a string in the format 06.9.1.1. Three other fields needs to be updated when this property is modified.

Back in the old days you would do this with calculated columns. Those fields had some restrictions like that they can not be mapped to managed properties to be used in search solutions.

Trigger

The trigger for the Flow is when a file is created or modified.

Create variable

A variable of the type String is required for later in the process. The value of the field pmjCriterion is assigned to it.

Update file properties

pmjSE displays the first two characters of the variable ‘varCriterion’ en uses the prefix “SE”
–> concat(‘SE’,substring(variables(‘varCriterion’),0,2))

pmjPI displays the first four characters of the variable ‘varCriterion’
–> substring(variables(‘varCriterion’),0,4)

pmjPI displays the first six characters of the variable ‘varCriterion’
–> substring(variables(‘varCriterion’),0,6)

So when an item is updated the result is:


Conclusion

With the use of Flow in combination with Expressions it is pretty easy to update properties based on other properties of a document.


Add a node to the Current Navigation via CSOM in SharePoint Online

You can add a link to the current navigation in SharePoint Online via the client side object model with the following method:   AddNodeToCurrentNavigationDownload the code here: AddNodeToCurrentNavigation

The method was inspired by this source: http://www.c-sharpcorner.com/Blogs/12172/how-to-create-a-node-in-the-quick-launch-bar-using-csom-in-s.aspx

How to update the JSLink of a Web Part via CSOM for all subsites in Office365

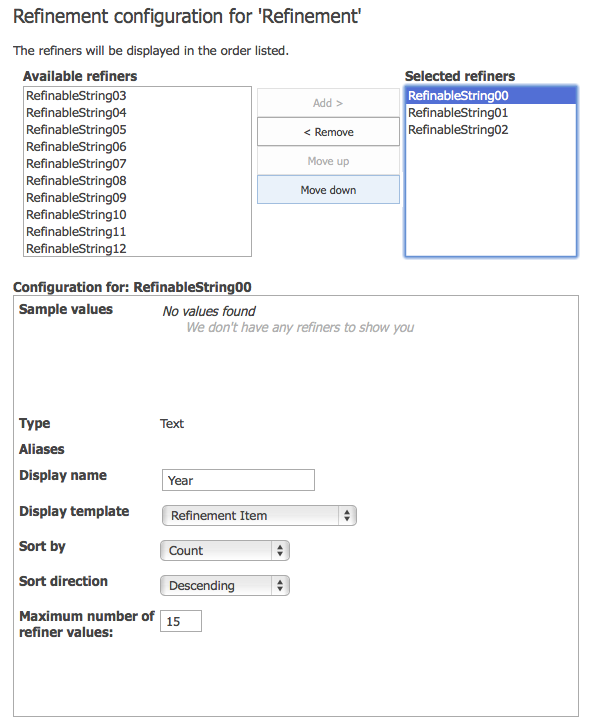
I had the requirement to change the JSLink for my custom list for all the subsites of a site collection. You would normally do this via PowerShell. My customer is using Office365 (what all customers should do…) and therefore are the possibilities of PowerShell limited. I found quite some examples on how to update a JSLink of a Web Part via the UI. However I wanted to update the JSLink via code. 

I started with the project Contoso.ApplyBranding.Console from the Office App Model Samples which is btw a great starting point for working with SharePoint Apps. The example I used is a console app project which has a settings.xml file in which you can add all the sites that have to be updated.

//Loop through all sites from the settings.xml

            foreach (var site in branding.Element(“sites”).Descendants(“site”))

            {

                var siteUrl = url.TrimEnd(trimChars) + “/” + site.Attribute(“url”).Value.TrimEnd(trimChars);

                using (ClientContext clientContext = new ClientContext(siteUrl))

                {

                    //Connect to the SharePoint Online site

                    clientContext.AuthenticationMode = ClientAuthenticationMode.Default;

                    clientContext.Credentials = credentials;

                    clientContext.Load(clientContext.Web);

                    clientContext.ExecuteQuery();


                    //Get the list

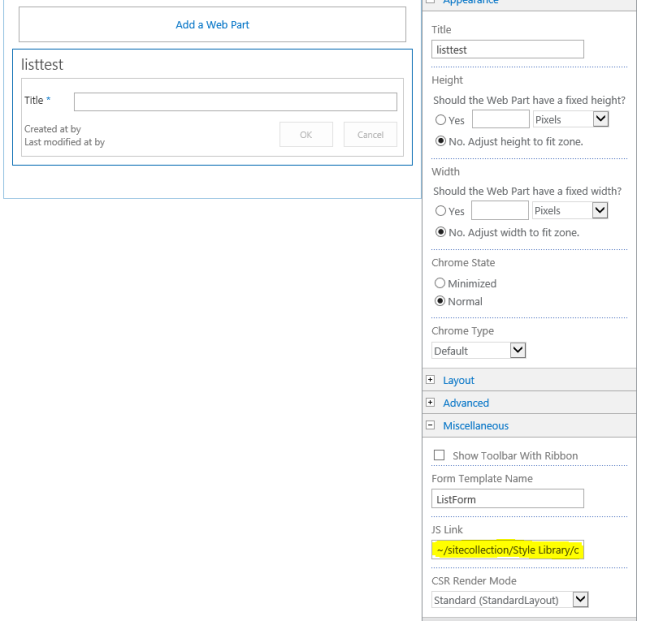
                    List list = clientContext.Web.Lists.GetByTitle(“Listtest”);

                    clientContext.Load(list);

                    clientContext.Load(list.Forms);

                    clientContext.ExecuteQuery();


                    //Get all the forms

                     foreach (var spForm in list.Forms)

                     {

                         //Get the edit form

                         if (spForm.ServerRelativeUrl.Contains(“EditForm.aspx”))

                         {

                            File file = clientContext.Web.GetFileByServerRelativeUrl(spForm.ServerRelativeUrl); 

                            LimitedWebPartManager wpm = file.GetLimitedWebPartManager(PersonalizationScope.Shared); 

                            clientContext.Load(wpm.WebParts, 

                            wps => wps.Include( 

                            wp => wp.WebPart.Title)); 

                            clientContext.ExecuteQuery();


                            //Set the properties for all web parts

                            foreach (WebPartDefinition wpd in wpm.WebParts) 

                            { 

                                WebPart wp = wpd.WebPart; 

                                wp.Properties[“JSLink”] = “~/sitecollection/Style Library/customer/customization.js”;

                                wpd.SaveWebPartChanges();

                                clientContext.ExecuteQuery();

                            } 

                        }

                    }

                }

            }            


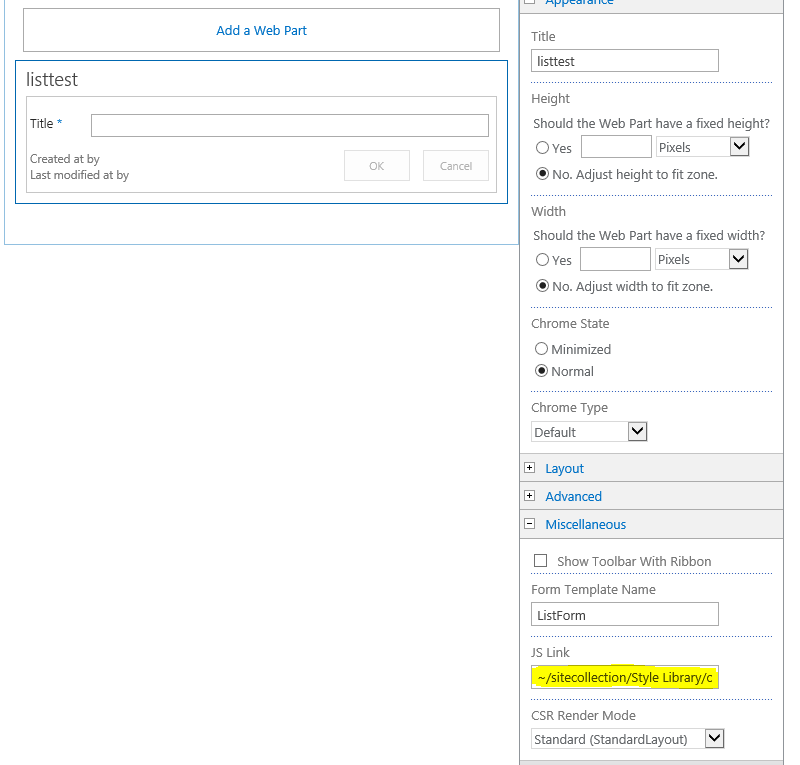
So this is the result:

Image

If you want you can of course also add your site collections to the settings.xml file and loop through them as well.

How to create custom refiners in SharePoint Online

A common requirement for SharePoint (Online) is to have custom refiners especially since search is getting more and more the preferred way of creating solutions. One reason is to be able to cross the Site Collection boundaries. This is how you configure custom refiners in SharePoint Online:

  • Create site columns. This can be done at the root site, but just as well on a subsite. Give the site columns a prefix so that they can be found more easily in the crawled properties. After they are created, they can be renamed which is more user friendly.

Image

Image

  • Create a list and add the site columns. Of course you can also first create a content type, add the columns to the content type and add that content type to the list. Be sure to add some items to the list.

Image

  • Reindex the list and the site. I am not sure if this is really needed, but it doesn’t harm the index process. The site columns need to be picked up by the crawl engine. The scheduled is planned for every 15 minutes so after that time the crawled properties should be available in the search area of SharePoint Online.
    • Go to the list settings and choose advanced settings

Image

Image

    • Go to the Site settings and choose Search and Offline availability

Image

Image

  • Go to the SharePoint admin center and select Search from the left menu. Select Manage Search Schema

Image

  • Select Crawled Properties and search if the site columns are already available

Image

  • Go to Managed Properties and search for the first available RefinableString which is one which doesn’t have a mapped crawled property. It is not possible to set the property Refinable to Yes for a custom Managed Propery therefore you need to use one of the already created Managed Properties which start with “Refinable”.

Image

  • Map the Managed Property to the Crawled Property

Image

  • The result should look like this

Image

  • Create a page with a Search results web part where only the results from the list are shown.

Image

  • Add a refinement web part to the page and choose the custom refiners. Set the Display name to the name of the column in the list

Image

  • It can take a while (in my case about a half hour) before the refiners are visible. But it is worth the wait:

Image

Use the SharePoint Color Palette Tool to easily change the color of a SharePoint site

With the SharePoint Color Palette Tool you can change the color of a SharePoint site easily. Just pick one main color and the tool will generate corresponding colors for the palette. You can do this as following:

image

  • Choose the Color button

image

  • Select the main color you want to use by using the Eye dropper

image

  • Select the color you want to use and click Ok

image

  • Select Recolor and the palette is rendered

image

image

  • Now you can save the palette as a .spcolor file

image

  • Upload the .spcolor file to the Themes folder (http:// [your site] /_catalogs/theme) via the browser or SharePoint Designer
  • Go to the Site settings and choose Change the look (it is not required to have the Publishing feature enabled)

image

  • Select the Current look

image

  • Select your palette from the Colors drop down and choose Try it out

image

  • If you like what you see you can decide to keep it

image

  • You have to change the look for every site in your site collection. To change all the sites in your site collection at once you can embed the .spcolor file in a Design Package.

Show totals in Content By Search Web Part

When you want to see the totals of your Content By Search Web Part you can update the Display Template. A better approach is to create a copy of an existing one and make the changes you want in there. Follow the next steps:

1) Go to the Master Page Gallery http://[yourserver]/_catalogs/masterpage navigate to the Display Templates folder and go to the Content Web Parts folder

image 

2) Since you want a total for all items (and not every item) you need to create a copy of one of the Control html pages. The .js file is automatically created so you don’t need to worry about that.

3) Add the following to the main div on the position that you want

<div id=”ResultCount” class=”ms-srch-resultscount”>
           _#=  $htmlEncode(totalRows.localeFormat(“N0”)) =#_ resultaten
</div
>

4) Upload the template to the Content Web Parts folder and give a descriptive title

image

5) Go to the properties of the Content By Search Web Part and select the items you just uploaded

image

6) The result will look something like this (I also changed the Item template)

image

User name not showing correctly in SharePoint 2013

When you have  usernames in SharePoint in the format “Last name, first name” it will show up in the dispform.aspx and editform.aspx of lists with an additional comma like “Last name,, first name”.

I discovered this issue in an on premise environment and could reproduce it in Office365

image

The name in the User Profile is displayed correctly. In this case the Display name is imported from AD and mapped to the Name field. It can also be reproduced by changing the name manually in the User Profile.

User profile

The inconsistent display of the username also affects the search results. This is shown in the refinement panel.

refiner

Currently the case is escalated to the SharePoint Escalation Services with a RFH (Request For Hotfix). When a fix or workaround (changing AD to “First name Last name” is not an option…) is provided I will update this post

Update 19-02-2013:  The escalation engineer confirmed this will be fixed in the June Cumulative Update (CU)

Custom Site Collection Search Center is reset in Office365

SharePoint Online, as part of Office365, has a default search center for every SharePoint Online environment. This is https://[yourname].sharepoint.com/search

image

When you create a new (custom) search center you can redirect all search queries to your search center. You can do this via Site actions –> Site Settings –> Search Settings

image

Site collection search settings_

When you enter the url of your search center all search queries are redirected to this location.

image

However this url is being reset once in a while back to de default. So from https://[yourname].sharepoint.com/[YourSearchCenter]  back to https://[yourname].sharepoint.com/search

Microsoft recognizes this as a bug and even admitted that this is happening in Office365 Preview (which is SharePoint 2013 Beta). Currently they are working on fixing this.

I was thinking I maybe has something to do when a full crawl is executed or when the user profiles are compilated. Since it’s not possible to check ourselves we just have to wait until Microsoft fixes it. That is one of the (dis)advantages of the cloud. Somebody else will fix it for you, but you cannot fix it yourself.

User profiles_

Microsoft said the only workaround right now is to use the default search center and apply the custom branding to that site.

What’s New in Visual Studio 2012 RC – SharePoint Development

  • Create lists and content types by using designers.

    You can more easily create a list or a content type by using a designer to set up and lay out the contents of the list or content type. For more information, see Creating Site Columns, Content Types, and Lists for SharePoint.

  • Create site columns for SharePoint sites.

    You can more easily create SharePoint site columns, which are also known as “fields,” by using an item template. For more information, see Creating Site Columns, Content Types, and Lists for SharePoint.

  • Add Silverlight web parts to your SharePoint projects.

    You can more easily and conveniently create Silverlight web parts by using a project template. For more information, see Walkthrough: Creating a Silverlight Web Part that Displays OData for SharePoint.

  • Publish SharePoint solutions to remote SharePoint sites.

    You can publish SharePoint solutions to remote SharePoint sites, in addition to local SharePoint sites. For more information, see Deploying, Publishing, and Upgrading SharePoint Solution Packages.

  • Increase SharePoint performance by using profiling tools.

    By using tools in Visual Studio, you can identify code and other elements that are slowing down your SharePoint projects and perform other performance profiling. For more information, see Profiling the Performance of SharePoint Applications and Analyzing Application Performance by Using Profiling Tools.

  • Create sandboxed visual web parts..

    You can include visual web parts in sandboxed SharePoint projects, not just farm projects.

  • Create sandboxed solutions more easily.

    When you’re working on a sandboxed solution in Visual Studio, only compatible APIs appear in Intellisense, and a compiler error occurs if you try to use farm-only API calls.

  • Debug JavaScript more easily.

    You can debug JavaScript in SharePoint projects, and IntelliSense is provided when you’re coding JavaScript in SharePoint projects. URLs for JavaScript are resolved for visual web parts in sandboxed solutions.

  • Develop SharePoint projects more easily by using streamlined project templates.

    To help streamline SharePoint development, some SharePoint project templates from the previous version of Visual Studio were moved into project item templates. For a full list and descriptions of the project and project-item templates, see SharePoint Project and Project Item Templates.

  • Test your code by using the Microsoft Fakes framework.

    SharePoint projects support Microsoft Fakes, which is an isolation framework in which you can create delegate-based test stubs and shims in .NET Framework applications and test your code by isolating your unit tests from the environment. For more information, see Verifying and Debugging SharePoint Code by Using ALM Features.

For more information, see What’s New for SharePoint Development in Visual Studio 2012 RC.